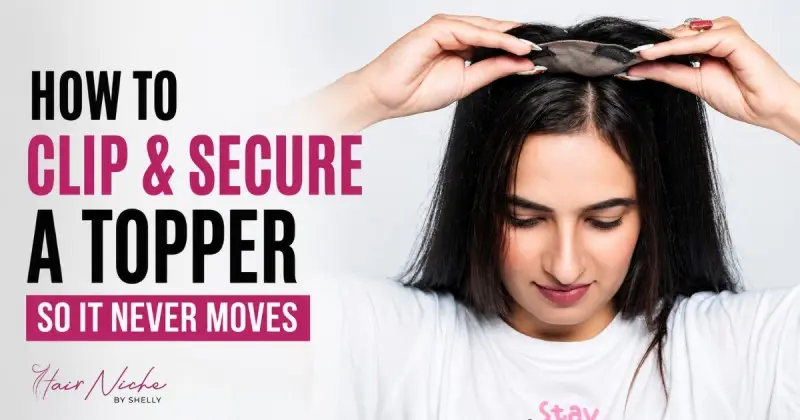
The single biggest fear women have about a hair topper isn’t how it looks — it’s the quiet dread that it might shift, lift or slide at the worst possible moment. That fear is what keeps a beautiful topper sitting in a drawer. The good news is that a topper that’s clipped in properly does not move, and getting it there takes about two minutes once you know the steps. Learning how to attach a hair topper securely is the difference between hoping it stays and forgetting you’re wearing it.
Here’s the exact, step-by-step method, plus how to add extra hold for windy or active days and the common mistakes that make a topper slip.
What you’ll need
- Your topper, brushed and ready
- A tail comb for parting and sectioning
- A mirror (a handheld one to check the back helps)
- Optional grip boosters: a little texturising or grip powder, or a hold product
Step by step: attaching your topper securely
1. Start with clean, dry hair. Clips grip dry hair far better than oily or wet hair. If your hair is very fine or freshly washed and slippery, a light mist of texturising spray or a touch of grip powder at the anchor points gives the clips something to hold.
2. Create grip at the anchor points (gently). Lightly backcomb a small section where each clip will sit — just enough to give the clip texture to bite into. Keep this gentle, and anchor into the fuller hair around your thinning rather than the most fragile strands.
3. Position the topper. Line up the topper’s part or crown with your own, sitting it so its front edge is a little behind your hairline. Getting the placement right first means the clips land where you want them.
4. Snap the front clip first. Open the front clip, press it into the prepared section, and close it firmly. The front clip sets the position, so get this one right before moving on.
5. Secure the side and back clips. Working from front to back, snap each remaining clip into its anchor section, keeping gentle tension so the base sits flat against your head. A flat base is a base that won’t lift.
6. Blend and test. Comb your own hair over the topper’s edges so they disappear, then give it a gentle tug from a few angles. If it holds firm, you’re done; if a clip shifts, reopen and reseat it.
Extra hold for windy or active days
For long events, dancing, or a breezy day, add belt-and-braces security:
- Grip powder or hold spray at the anchor points for extra bite.
- A secure hairline — a little hold product smooths flyaways so nothing lifts the front edge.
- You’ll find both in our hair-care essentials range.
For most everyday wear, well-seated clips alone are plenty — these extras are just for high-movement days.
Common mistakes that make a topper slip
- Clipping into oily or wet hair — the number one cause of slipping. Always start dry.
- A base that’s the wrong size — too small and there’s nowhere secure to anchor. Our size guide helps you get it right.
- Skipping the grip prep — perfectly smooth, fine hair needs a little texture for clips to hold.
- Clipping onto the thinnest hair — anchor into the fuller hair around the area, not the sparse centre.
Caring so the clips keep gripping
Rotate the clip positions slightly day to day so no single spot takes constant tension — better for your hair and your comfort, as we cover in can you wear a topper every day. Keep the clips clean and check they still snap firmly; a clip that’s loosened over time can be gently tightened or replaced.
Clip it once, forget about it all day
A topper that’s attached properly genuinely doesn’t move — no lifting, no sliding, no second-guessing. Start dry, prep your anchor points, set the front clip first, and seat the rest against a flat base. Two minutes, and you’re free to forget you’re wearing it.
If you’d like to be walked through it for your own hair, our stylists will show you live on a free video consultation and make sure your topper fits and holds. Not bought yet, or unsure of the size? Browse the hair toppers range or check whether you need a crown or full-top piece first — the right fit is what makes the hold effortless.
FAQs
1. How do I attach a hair topper so it doesn’t move?
Start with clean, dry hair, lightly prep each clip’s anchor point for grip, set the front clip first, then secure the side and back clips against a flat base. Test with a gentle tug.
2. Why does my hair topper keep slipping?
The most common causes are clipping into oily or wet hair, a base that’s too small to anchor, or fine hair with no grip prep. Fixing these usually stops the slipping.
3. How do I secure a topper on very fine or thin hair?
Add a little grip powder or texturising spray at the anchor points, and clip into the fuller hair around the thinning rather than the sparse area, so the clips have something to hold.
4. Do I need glue or tape for a clip-in topper?
Usually no — well-seated clips hold firmly on their own. Grip powder or a little hold product is enough for windy or active days; tape and glue are more relevant to bonded pieces.
5. Should I backcomb my hair to attach a topper?
A light tease at each clip point gives grip, but keep it gentle and anchor into healthy hair. Grip powder is a good alternative if you’d rather not backcomb.
6. How long does it take to put a topper on?
About two minutes once you’re used to the steps. Positioning the front clip correctly is what makes the rest quick.
7. Can I wear a topper for dancing or a windy event?
Yes. Add grip powder or a hold product at the anchor points and smooth the hairline, and a well-clipped topper stays put through movement.
8. Will the clips damage my hair?
Not when you rotate their position and anchor into fuller hair. Constant tension in one spot is the only thing to avoid.
9. How do I stop the front edge of my topper lifting?
Set the front clip firmly first, position the edge just behind your hairline, and smooth flyaways with a little hold product so nothing catches the edge.
10. What size topper is easiest to keep secure?
One sized correctly to your thinning area, so the clips reach fuller hair around it. A base that’s too small has nowhere secure to anchor; our size guide helps you choose.